|
|
|
|
|
||||||||
|
|
|||||||||
| Home | Forums | Register | Gallery | FAQ | Calendar |
| Retailers | Community | News/Info | International Retailers | IRC | Today's Posts |
 |
|
|
Thread Tools |
 November 19th, 2011, 15:54
|
#1 |

|
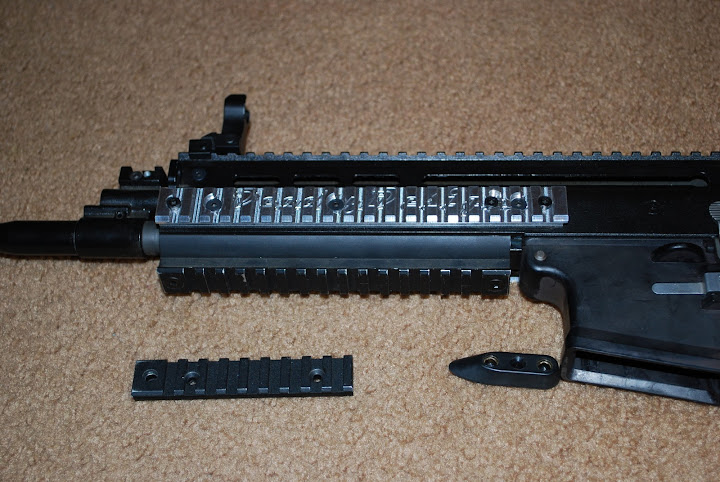
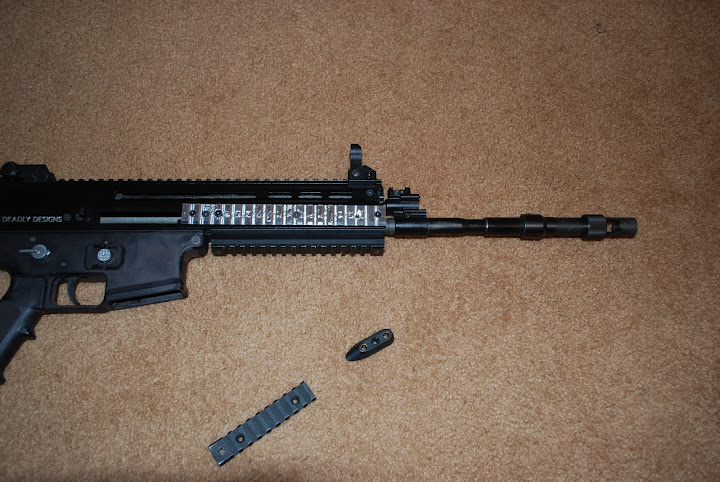
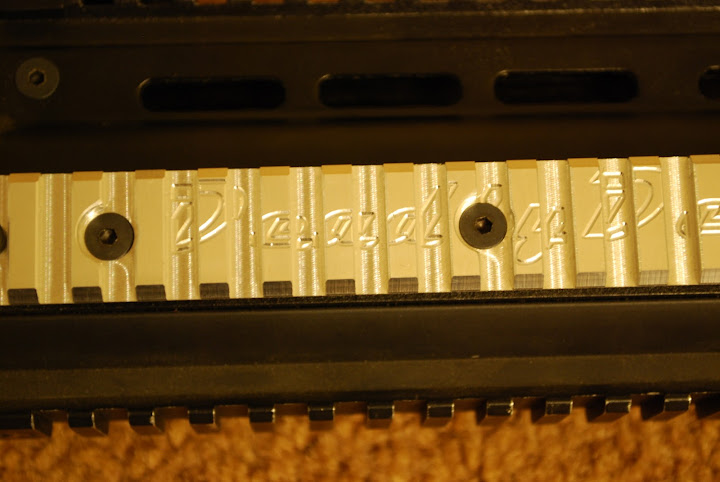
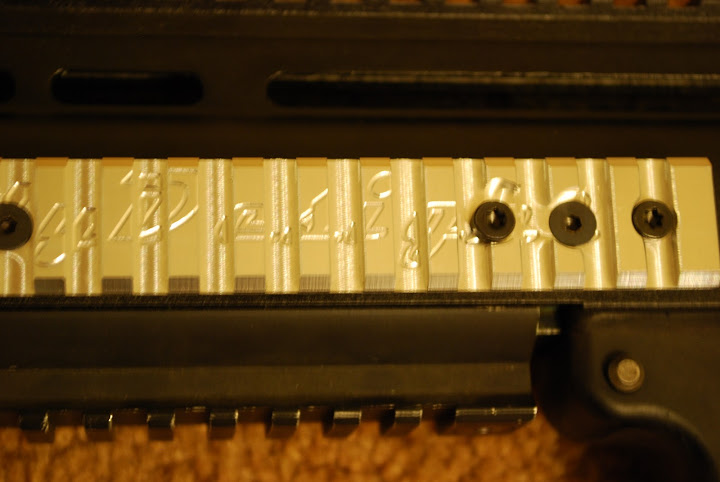
So I got bored at work and after making a rail for Ironsights AUG, I was like hey, the scars rails on the left and right side of the receiver should be extended all the way back to the ejection port. Eliminating the small rail and plastic screw deal. These were two quick rails I made, still need a little tweaking, Im pretty sure im going to replace all the TORX screws with Flathead M5 screws, and the flathead M4 screws will be the original ones you already have in the scar. Or if they need to be longer I will also put those in. Not sure if Im going to keep the engraving the same or make it smaller or just symbol or what. Also as I said the torx screws will be flathead so all the slots that are rendered useless by the Torx screw will be available as the flat heads...obviously sit flat on in the groove. The rails are your MIL STD 1913 Picatinny rail. PICSSS!!!!
|

|

|
|
November 19th, 2011, 17:01
|
#2 |
|
|
it's a very nice idea and the longer rails open up more room for attachments but, for one you need to change the colour to match the rest of the gun and, two the engraving on the rails look a little odd. other then those two easy to fix things it looks magnificent.
|
|
|
|
|
November 19th, 2011, 17:04
|
#3 |
|
|
They are prototypes. As I stated, wasnt sure on engraving, I love it looks wicked and I didnt feel like shipping a prototype off to anodizing to get it done in black. Production runs will be ano'd black
|
|
|
|
|
November 19th, 2011, 17:20
|
#4 |
|
|
well anyways they look magnificent keep up the good work. also something else you should do is make a new custom fire selector for that custom scar you got. and i don't mean just the colour like the whole design of it.
|
|
|
|
|
November 19th, 2011, 17:21
|
#5 |
|
|
What are you thinkin of for the fire selectors? Have you seen the magpul versions?
|
|
|
|
|
November 19th, 2011, 17:41
|
#6 |
|
|
I have a quick question. How did you cut the bevel underneath? I'm guessing you had to flip it and then mill the bottom?
__________________
AIRSOFT PRECISION DYNAMICS - Augmenting Reality |
|
|
|
|
November 19th, 2011, 17:48
|
#7 |
|
|
I flipped and milled the bottom only to mill the rectangle for size so your clamps didnt hit anything. I have a cutter that has one carbide insert, its .5x.5" So it looks like this
 adjust for cutter comp and have the top half of the carbide insert cut the bottom bevel. I had to lie to the program and machine to get it to cut like that |
|
|
|
|
November 19th, 2011, 17:58
|
#8 |
|
|
Nice work for sure. I would buy a set of those from you for sure. Get em done lol.
|
|
|
|
|
November 19th, 2011, 18:01
|
#9 |
|
|
Do you like the Engraving or prefer something different. I was thinking if I got to many complaints/dislikes about the engraving I have now then I was thinking either A DD in some artsy arrangment or just the Crosshair design On top of the rail
|
|
|
|
|
November 19th, 2011, 18:34
|
#10 |
|
|
It looks awesome. I love the looks of your SCAR as well. If I may make a suggestion, the scar would look gorgeous if the upper receiver was OD green don't you think.
__________________
 SuperCriollo |
|
|
|
|
November 19th, 2011, 18:41
|
#11 |
|
|
Id have to try that, though Im not sure if I have any OD green powder for my powdercoating gun. Id have to order some. Do a photoshop job to see how it'd look =P
|
|
|
|
|
November 19th, 2011, 18:48
|
#12 | |
|
|
Quote:
keep up the good work 
__________________
AIRSOFT PRECISION DYNAMICS - Augmenting Reality |
|
|
|
|
|
November 19th, 2011, 19:02
|
#13 |
|
|
Ok so you should be familiar with what we call "ops" then.
my first op was to take a solid block of aluminum  and mill this out of it That includes both bevels. They are 45degree angles. the only reason I flipped them over was to do my second op, which was for this..... 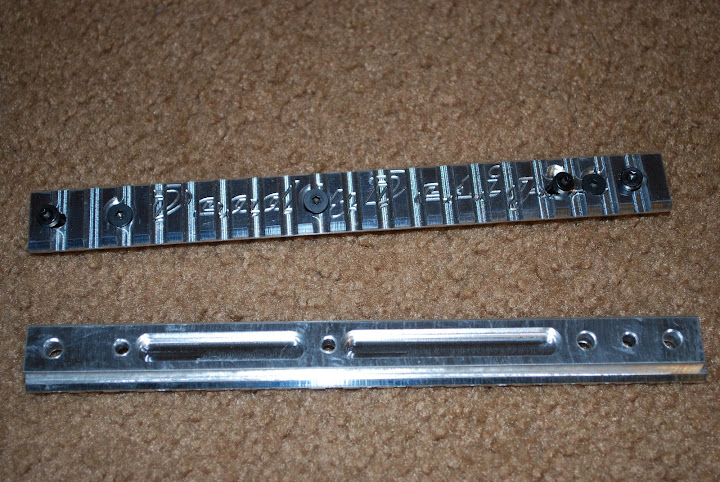  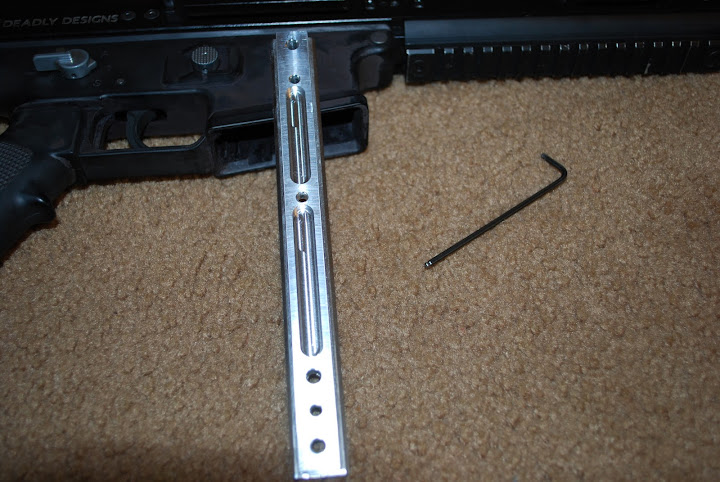
|
|
|
|
|
November 19th, 2011, 19:05
|
#14 | |
|
|
Quote:

|
|
|
|
|
|
November 19th, 2011, 19:07
|
#15 |
|
|
Yea, but I mean you have like any ideas on what you would like out of it?
|
|
|
|
 |
|
||||||
| Bookmarks |
|
|
 |
|